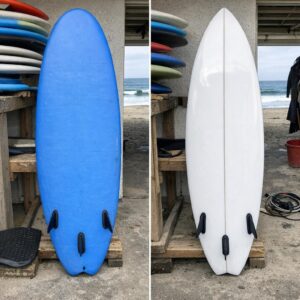

Most surfboards do not fail because the owner forgot an elaborate maintenance ritual. They are usually damaged by a handful of ordinary moments: a hot car, an open crack that returned to the water, an unpadded rack, a fin pushed into the wrong box or a board dropped onto its rail.
Good care is less about making a board look new and more about keeping its outer shell watertight, protecting vulnerable edges and noticing damage before it spreads.
This guide covers hard surfboards, epoxy constructions and soft-top beginner boards. Because materials and repair systems vary, the manufacturer’s instructions should always take priority over a generic online recommendation.
The central rule: inspect first, keep the board away from unnecessary heat and stop using it when the skin is open or the structure feels unstable.
out
Once the outer skin is cracked or punctured, water may reach the internal foam or damaged laminate. Covering the area with ordinary tape may help protect it during transport, but it is not a proper watertight repair for another surf session.
The five-minute routine after a normal session
A board that has not been damaged does not need a full workshop treatment after every surf. A simple repeatable routine is usually enough.
Use fresh water to remove sand and salt residue from the board, fins, leash plug and removable hardware.
Check the rails, nose, tail, deck, bottom, fin boxes and leash attachment for fresh damage.
Wipe the board and allow trapped water around covers, pads or softboard seams to drain as appropriate.
Move the board away from direct sun, hot pavement, sealed vehicles and other heat sources.
Use a padded, stable support that does not concentrate pressure on one rail, fin or corner.
Fresh-water rinsing is particularly useful for keeping removable fins, screws, leash hardware and surface areas clean. It does not reverse structural damage or make an open crack safe.
Learn the difference between normal wear and a problem that needs attention
The surface remains intact, dry and firm, with no sharp edge, opening or movement around the area.
The damage may be more than cosmetic, especially if it changes under light pressure or appears to cross the outer laminate.
Water can enter the board, and continued use may enlarge the repair area or create sharp edges.
Keep a simple maintenance log for damage that may change
You do not need professional inspection equipment to notice that a crack is growing. A few notes and consistent photographs can help you compare the same area over time.
Record when you first noticed the mark and whether it followed an impact, transport problem or normal use.
Note whether it is on the deck, bottom, rail, nose, tail, leash plug or beside a particular fin box.
Describe an opening, discoloration, softness, movement, bubbling, sharp edge or change in weight without guessing at the cause.
Take one full-board image and close photographs with a common object for scale. Keep original files when contacting a retailer or repairer.
Record whether the board was removed from use, inspected professionally, repaired or reported under a warranty process.
Heat and sunlight can damage a board even when it is inside a bag
A board bag protects against scratches and minor impacts, but it does not make a board safe inside a hot vehicle or in direct sun. A closed bag can become very hot, particularly when it is left on a roof, pavement or inside a sealed car.
A shaded, dry and ventilated space with stable supports is generally the preferred long-term environment.
Normal use in daylight is unavoidable, but return the board to shade when it is not being prepared or ridden.
Heat can build around the board. Do not treat the bag as a sun shelter.
This is a preventable high-risk storage habit and is excluded by many manufacturer warranties.
Heat-related damage can appear as bubbling, distortion, separation between layers, color changes or unusual soft areas. Do not puncture a bubble, drill the board or attempt to flatten it with weights. Ask the manufacturer, retailer or an experienced repairer to assess it.
Store the board where it cannot fall, twist or rest on one vulnerable point
Better storage habits
- Use a padded wall rack, freestanding rack or stable horizontal support.
- Distribute the board’s weight across more than one padded contact point.
- Keep the board away from heaters, windows with strong direct sun and damp corners.
- Allow a wet bag, sock or soft-top board to dry according to its care instructions.
- Store removable accessories where fins and sharp tools cannot strike the board.
Storage that invites damage
- Balancing the board upright on the nose or tail.
- Leaning a rail against concrete, metal shelving or a sharp garage corner.
- Stacking heavy objects on the deck.
- Leaving the fins to carry the board’s weight.
- Keeping a damp board permanently sealed in a dirty bag.
If several boards are stacked, use suitable padding and make sure fins, buckles, zippers and hard accessories cannot press into the board below. A board sock offers light scratch protection but is not equivalent to a padded travel bag.
Transport damage often happens before the vehicle starts moving
Parking lots, doorways and roof loading create many rail and tail impacts. Slow down when turning with a long board, check the clearance above you and place the board on a padded surface while preparing the straps.
- Use a rack system, pads and straps designed for the vehicle and load.
- Follow the rack, vehicle, board-bag and strap manufacturers’ instructions.
- Keep buckles and hard hardware away from direct contact with the board.
- Tighten enough to secure the load without crushing or deeply compressing the rails.
- Secure loose strap ends so they cannot whip against the vehicle or board.
- Check the complete load before driving and again after the first part of the journey.
- Respect local rules covering overhang, visibility, load limits and warning markers.
- Remove or protect fins when required by the bag, rack or travel arrangement.
There is no single board orientation that is automatically correct for every vehicle, rack, board shape and bag. Use the configuration approved for your equipment rather than copying a photograph online.
Repair materials must match the board’s construction
The word “fiberglass” does not identify the complete construction. A surfboard may use a polyurethane foam core with polyester resin, an EPS core with epoxy resin, molded composite layers or a soft exterior over a different internal structure.
| Board type | Important repair consideration | Safer beginner decision |
|---|---|---|
| EPS and epoxy board | Polyester resin can damage exposed EPS foam. Epoxy-compatible materials are normally required. | Confirm the construction through the manufacturer, label, retailer or repair shop. |
| Polyurethane and polyester board | The repair must still use suitable resin, cloth, preparation and curing conditions. | Do not assume a product is correct only because it says “surfboard repair.” |
| Soft-top surfboard | The skin, seams, internal foam and adhesives may require brand-specific products. | Follow the board manufacturer’s repair guide instead of using a hard-board kit automatically. |
| Unknown construction | Choosing the wrong chemical can enlarge the damage or affect the foam. | Pause the repair and obtain identification or professional help. |
Epoxy resin is commonly specified for EPS-core boards. Brands such as Firewire and Torq explicitly warn against using polyester repair products on their epoxy and EPS constructions.
UV-curing repair products can be useful for certain small compatible repairs, but the product label, depth of damage, moisture level, construction and curing conditions still matter. A fast cure does not compensate for trapped water, poor preparation or the wrong resin.
A safer repair sequence for a newly discovered ding
Continued surfing may allow more water into the board or enlarge the damaged area.
Avoid squeezing, standing on or repeatedly flexing the board to test the damage.
Remove surface salt and sand without forcing water into exposed foam. Follow brand-specific instructions for soft boards.
Repairing over retained moisture can trap water inside. Drying time varies with the construction, damage and environment.
Use a serial number, product page, retailer or manufacturer support channel when the construction is unclear.
Loose fin boxes, delamination, snapped sections, crushed rails, large punctures and structural movement should generally be assessed professionally.
Do not return the board to water merely because the surface feels hard. Observe the product’s preparation and curing requirements.
Know when a repair belongs in a professional workshop
Home repair kits are best reserved for damage that is small, clearly understood and compatible with the product. Seek experienced help when you notice:
- A fin box or leash plug moving inside the board.
- A wide soft area or visible separation between layers.
- Foam that appears saturated, discolored or unusually heavy.
- A crack crossing a rail, tail, nose or structurally loaded area.
- A snapped board or significant crease across the deck or bottom.
- Repeated cracking around an earlier repair.
- A repair area that cannot be made clean and fully dry.
- Uncertainty about the foam, resin, skin or molded construction.
A professional repair does not automatically restore the board to its exact original strength, weight or appearance. Ask what can realistically be achieved and whether the cost makes sense for the board.
Fin boxes need gentle handling and the correct hardware
Do not force a fin that does not fit easily
Different fin systems use different tabs, screws, plates and locking methods. Confirm that the fin and hardware match the box before applying pressure.
Sand, salt residue or a damaged box can make a correct fin difficult to install. Clean and inspect the parts first. If resistance remains, follow the fin-system instructions rather than hammering, twisting or driving the screw harder.
A fin that moves after correct installation may indicate worn hardware, an incompatible fin or damage to the box.
- Correct fin set
- Compatible screws or plate
- No cracks around the box
- No unexplained movement
- Clean contact surfaces
- Correct installation tool
Do not overtighten fin screws. The purpose is to secure the fin according to the system instructions, not to use maximum force. Stop when the specified fit is achieved.
Check the leash string and rail saver as part of board care
A leash string that is too long can allow the narrow cord to pull directly against the rail. The wider rail saver should be positioned to spread the load over the board’s edge according to the leash and board instructions.
Inspect the leash plug, string, knot, rail saver, swivels, cord and cuff. Replace damaged or questionable parts rather than waiting for a complete failure.
A sound leash helps reduce separation from the board, but it does not make the surfboard a lifesaving device and does not replace swimming ability.
Soft-top surfboards require their own care instructions
Soft boards are not simply hard boards with a softer surface. Their skins, seams, fin systems, plugs and internal constructions vary significantly between brands.
Some manufacturers advise rinsing, wiping and drying the board before storage and warn against solvents or unrelated bodyboard repair products. Some also state that a limited amount of water drainage after use can be normal for their particular construction.
Do not generalize that statement to every soft-top board. Unexpected weight gain, swelling, open seams, prolonged leaking, bubbling or changes in shape should be checked against the specific manufacturer’s guidance.
Never drill drainage holes, inject random glue or seal every visible opening without first understanding how the board is designed.
Clean wax without cooking the board or damaging the finish
Wax buildup is mainly a grip and cleanliness issue. It does not need to be removed after every session.
When removal is necessary:
- Work in moderate conditions rather than leaving the board to bake in strong sun.
- Use a plastic wax comb or scraper that will not cut the laminate.
- Lift the wax gradually instead of digging into pressure dents.
- Check the manufacturer before applying any solvent or cleaning chemical.
- Keep chemicals away from soft skins, traction adhesives, paint and exposed foam unless approved.
- Inspect the newly exposed deck for cracks or damage that the wax had hidden.
Avoid metal scrapers, fuel, paint thinner, acetone and improvised household chemicals unless the manufacturer explicitly approves a specific product and method.
Some boards have vent systems that should not be improvised
Certain boards use a manual vent plug, automatic membrane vent or another pressure-management system. Others have no user-serviceable vent at all.
Follow the exact instructions for the model. Do not remove, loosen, seal, replace or drill a vent based on advice for a different board. An incorrectly handled vent can allow water entry or create pressure-related damage.
If a vent is missing, damaged or contaminated, contact the manufacturer or an appropriate repair technician before using the board.
Adjust the routine when the board is used frequently or travels often
Inspect small areas often
Pay particular attention to the rail, tail, leash plug and fin boxes. Repeated minor impacts are easier to miss than one major accident.
Recheck heat and straps
Stop safely to inspect the rack, bag, strap tension and exposure to direct sun during breaks.
Document the condition
Photograph the board before packing, add appropriate padding and inspect it before signing away any claim rights.
Clean and support it properly
Remove sand and residue, dry the equipment, use stable padded supports and keep the storage area cool and dry.
Look beyond the wax
Check repairs, soft areas, fin boxes, rails, vent system and signs of water entry before relying on cosmetic appearance.
Inspect before the next session
A collision can create a small opening that is difficult to see while the board is wet or covered in wax.
Maintenance mistakes that create more damage
- Returning an open ding to the water with only ordinary tape over it.
- Using polyester resin on exposed EPS foam.
- Leaving the board in a closed vehicle after the session.
- Assuming a board bag prevents heat damage.
- Crushing the rails with excessive roof-strap tension.
- Forcing an incompatible fin into the box.
- Resting the board’s full weight on the fins, nose or tail.
- Using hard-board repair chemicals on a soft board without approval.
- Puncturing bubbles or drilling holes to release pressure.
- Applying repair material before the damaged area is properly dry.
A practical inspection before the next surf
Run your hand and eyes around the complete board
- Rails have no fresh open crack or sharp area.
- Nose and tail remain firm and sealed.
- Deck and bottom show no new soft or lifting areas.
- Fins are compatible, seated correctly and secure.
- Fin boxes show no cracking or movement.
- Leash plug and string are intact.
- Rail saver sits in the correct position.
- Any previous repair remains closed and firm.
- Vent system appears complete and correctly set.
- Board has not developed unexplained extra weight.
When something feels different and you cannot explain it, delaying one session is less costly than turning a small repair into a large one.
The habits that protect a board for the long term
You do not need to polish the board after every session or collect a large box of repair chemicals. Focus on the habits that prevent avoidable damage:
Keep the board away from extreme heat, use padded storage and transport, inspect vulnerable areas, install fins and leash hardware correctly, and never return an open ding to the ocean.
When repair is necessary, identify the construction before choosing the product. An epoxy hard board, a polyester board and a soft-top board may require completely different materials and techniques.
A surfboard will still collect pressure dents, scratches and signs of use. The goal is not to prevent every cosmetic mark. It is to preserve a watertight, structurally sound board that remains appropriate for the sessions you intend to surf.
Manufacturer care and repair references
- Firewire Surfboards: board care, heat, fin care and epoxy repair guidance
- Torq Surfboards: EPS and epoxy repair compatibility
- Catch Surf: softboard care, storage, transport and repair guidance
- Global Surf Industries: longboard fin installation guidance
- Global Surf Industries: leash string and rail saver positioning
Board constructions and warranty requirements vary. Consult the care instructions supplied by the manufacturer of your exact board before cleaning, repairing, modifying or replacing components.